
Web App Guide
Discover how easy it is to navigate the Lucky Services web app. Our step-by-step tutorials will help you make the most of our services.
Manage your services in one place.
Streamline your service experience with our intuitive web platform.
Manage Your Schedule: Book new services, reschedule, and see all your upcoming jobs at a glance.
Save Time: Use the "Rebook" function to book your favorite services again in just a few clicks.
Stay Updated: Get notifications and communicate with your Lucky Assistant all in one place.
How to create your Lucky Services account.
Welcome! Creating an account is the first step to booking a Lucky Assistant. This quick tutorial will walk you through setting up your profile. In just a few simple steps, you'll be ready to start using our platform.
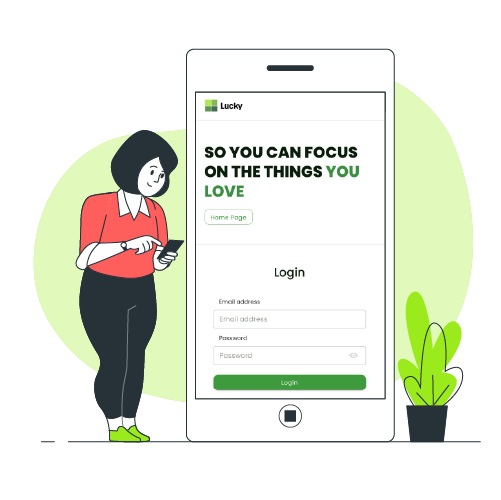
Access the app: Click here to access the Lucky Services app on your computer or phone.
Follow these steps to create and activate your new account.
Part 1: The Registration Form
- Go to the Web App: Open your internet browser and go to https://app.goluckyservices.com/
- Start Registration: On the login screen, find the "No account?" text and click the "Registration" link.
- 3. Enter Your Details - Fill out the form with your information:
- Your Email Address
- Your Phone Number
- Your First and Last Name
- Set Your Location: Select your Primary Service Area from the dropdown menu (e.g., "Durango Colorado").
- Create a Password: Enter a secure password for your account.
- Review and Consent: You must check two boxes:
- Privacy Policy: Check the first box to accept the Privacy Policy (you can click the link to read it).
- Text Messages: Check the second box to consent to text messages. We only use texts to communicate important job details, such as if we have trouble accessing a property or have a question about a task.
- Submit the Form: Click the "Register" button.
Part 2: Email Verification
- Check Your Email: Go to your email inbox for the address you just used to register.
- Find the Email: Look for an email from Lucky Services with a subject line like "Complete your Lucky Services registration."
- Verify Your Account: Open the email and click the "Verify" link inside. This will confirm your account and take you back to the app.
Part 3: Add Your Billing Information
After verifying your email, you will be on your new Client Dashboard. You have one final (but important) step before you can book a job.
- Add Payment Method:
- On your dashboard, find the billing information section.
- Enter your Card Number and other payment details.
- Check the box to "Save for future payments."
- Click the "Save" button.
Note: You can skip adding your payment method right now, but you will be required to enter it when you try to book your first service. Doing it now makes your first booking much faster!
You're All Set! Your profile is now complete, and you are ready to request your first Lucky Assistant.
How to book a recurring service.
Set it and forget it! Use this guide to schedule regular services like a bi-weekly house clean or monthly lawn care.
Book a service or recurring service.
This process has three main parts:
How to create your job request
- Start the Request: From your client dashboard, click the "Request Service" button in the top-right corner.
- Set as Recurring:
- On the first screen, select "Recurring Job".
- Choose your frequency (e.g., "Every two weeks," "Once a month").
- Select an end date (e.g., set it for one year from now, such as January 1st, 2025).
- Click "Next Step".
- Select Service: Choose the service you want, such as "General Home Cleaning", and click "Next Step".
- Fill Out the Service Form:
- Last Name: Enter your last name.
- Title: Give your job a clear title (e.g., "Bi-weekly Home Clean").
- Description: This is important! If you have a regular cleaner, please request them by name here (e.g., "Monica to clean home every other week").
- Service Address: Select your address.
- Date:
- If you are a new client: Choose your ideal start date for the first clean.
- If you are an existing client: Choose the date of your next already scheduled cleaning.
- Time: Set your preferred Start Time and End Time for the service (e.g., 9:00 a.m. to 1:00 p.m.).
- Review and Submit:
- Review the Service Price Estimate.
- Please Note: This is an estimate. You are billed in 15-minute increments for the actual time your Lucky Assistant is on-site. This estimate does not include mileage, taxes, fees, or any reimbursements (like for special products).
- Click the "Request Service" button.
- Review the Service Price Estimate.
Your job is not fully booked yet. You must complete a one-time questionnaire for this service.
- Go to Service History: After submitting the request, click on "Service History" in your dashboard. You will see your new recurring jobs listed.
- Take Questionnaire: Click the "Take Questionnaire" button.
- Fill It Out: Be as thorough as possible.
- Add any useful directions for finding your home.
- Fill in details like bedrooms, bathrooms, and square footage.
- Review our "Basic Cleaning Checklist" to see what's included.
- In the text box provided, add any specific tasks you want done that are not on the standard checklist.
- Add any other notes for your cleaner.
- Submit Questionnaire: Click "Submit".
Important: This questionnaire is a one-time setup for this recurring service. It will be attached to all future cleans. If you need to make changes later, you must call or text the Lucky Services office.
After you submit the questionnaire, your job is active. You can check its status at any time in your "Service History".
- Pending (Clock Icon): We have received your request and are working on assigning a Lucky Assistant.
- Assigned (Person Icon): Your job is confirmed, and an assistant has been assigned. You will see their name on the job.
- Completed (Green Checkmark): The job is finished! Your assistant has clocked out, and the service is complete.
How to use the rebook function.
This is a critical time-saving feature!
You should use the "Rebook" function for any job we have completed for you in the past that is not on a fixed, repeating schedule. This is perfect for vacation rental/Airbnb turnovers, which happen on random days.
The most important benefit: Using "Rebook" copies all your previous job details, including your service questionnaire. This means you do not have to fill out the entire questionnaire every single time you book.
- Find a Completed Job
- Go to your "Service History" on the dashboard.
- Scroll down until you find a completed job of the same type (it will have a green checkmark).
- Click the "Rebook" button on that completed job.
- Set Job Type:
- Select "One-time job"
- Click "Next Step".
- Confirm Service: The service (e.g., "Airbnb vacation rental cleaning") will already be highlighted. Just click "Next Step" again.
- Update job details (very important):
- Your name and address will be pre-filled.
- Update the description: Add any new or specific info for this job (e.g., "This is a turnover. Next check-in is11/1").
- Update the date adn time: select the new date adn teh new start/end time for this service
- Request service: click the "Request Service" button.
Final step: confirm your questionnaire
Your job is now in your "Service History" as "Pending," but you have one last easy step.
- Find the new job: In your "Service History," find the new "Pending" job your just created.
- Click the "Take Questionnaire" button.
- Review and submit: You will see the questionnaire is already auto-populated with all your answers from last time!
- Review the details to make sure nothing has changed.
- Scroll to the bottom and click "Submit".
That's it! Your job is now fully confirmed without you having to re-type all your property details, access codes, and cleaning preferences.
Need Help? We're Here!
Our dedicated support team is ready to assist you with any questions or concerns you may have. Don't hesitate to reach out for help; we're just a click or call away!